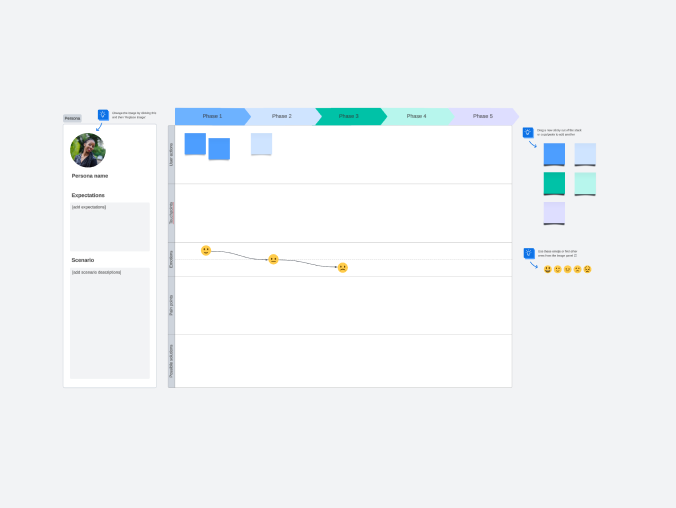
You can also pair story mapping with customer journey mapping to understand what users are thinking and feeling at each stage, helping you remove friction and add moments of delight.
2. Identify the problem
What problem is your service or product helping the customer overcome? Keep a user-first mindset during this step to visualize how the end user will experience the product. If you're stuck on how to convey this information, remember the format given earlier: "As a user, I want to [the action], so that [the benefit] happens."
3. Map user activities
Interactions with your product will take the form of user activities. These activities act as anchor points as you create your user story map. Under each activity, a series of user stories creates the larger customer journey.
If you are facilitating a workshop, brainstorm user activities before moving to related pain points and goals. Working systematically through these categories allows your team to focus on one objective at a time. Whether working in person or remotely, allow for periods of quiet contemplation where team members can consult their notes or research independently. Giving your team space for deep thinking leads to higher-quality insights than rapid-fire discussion alone.
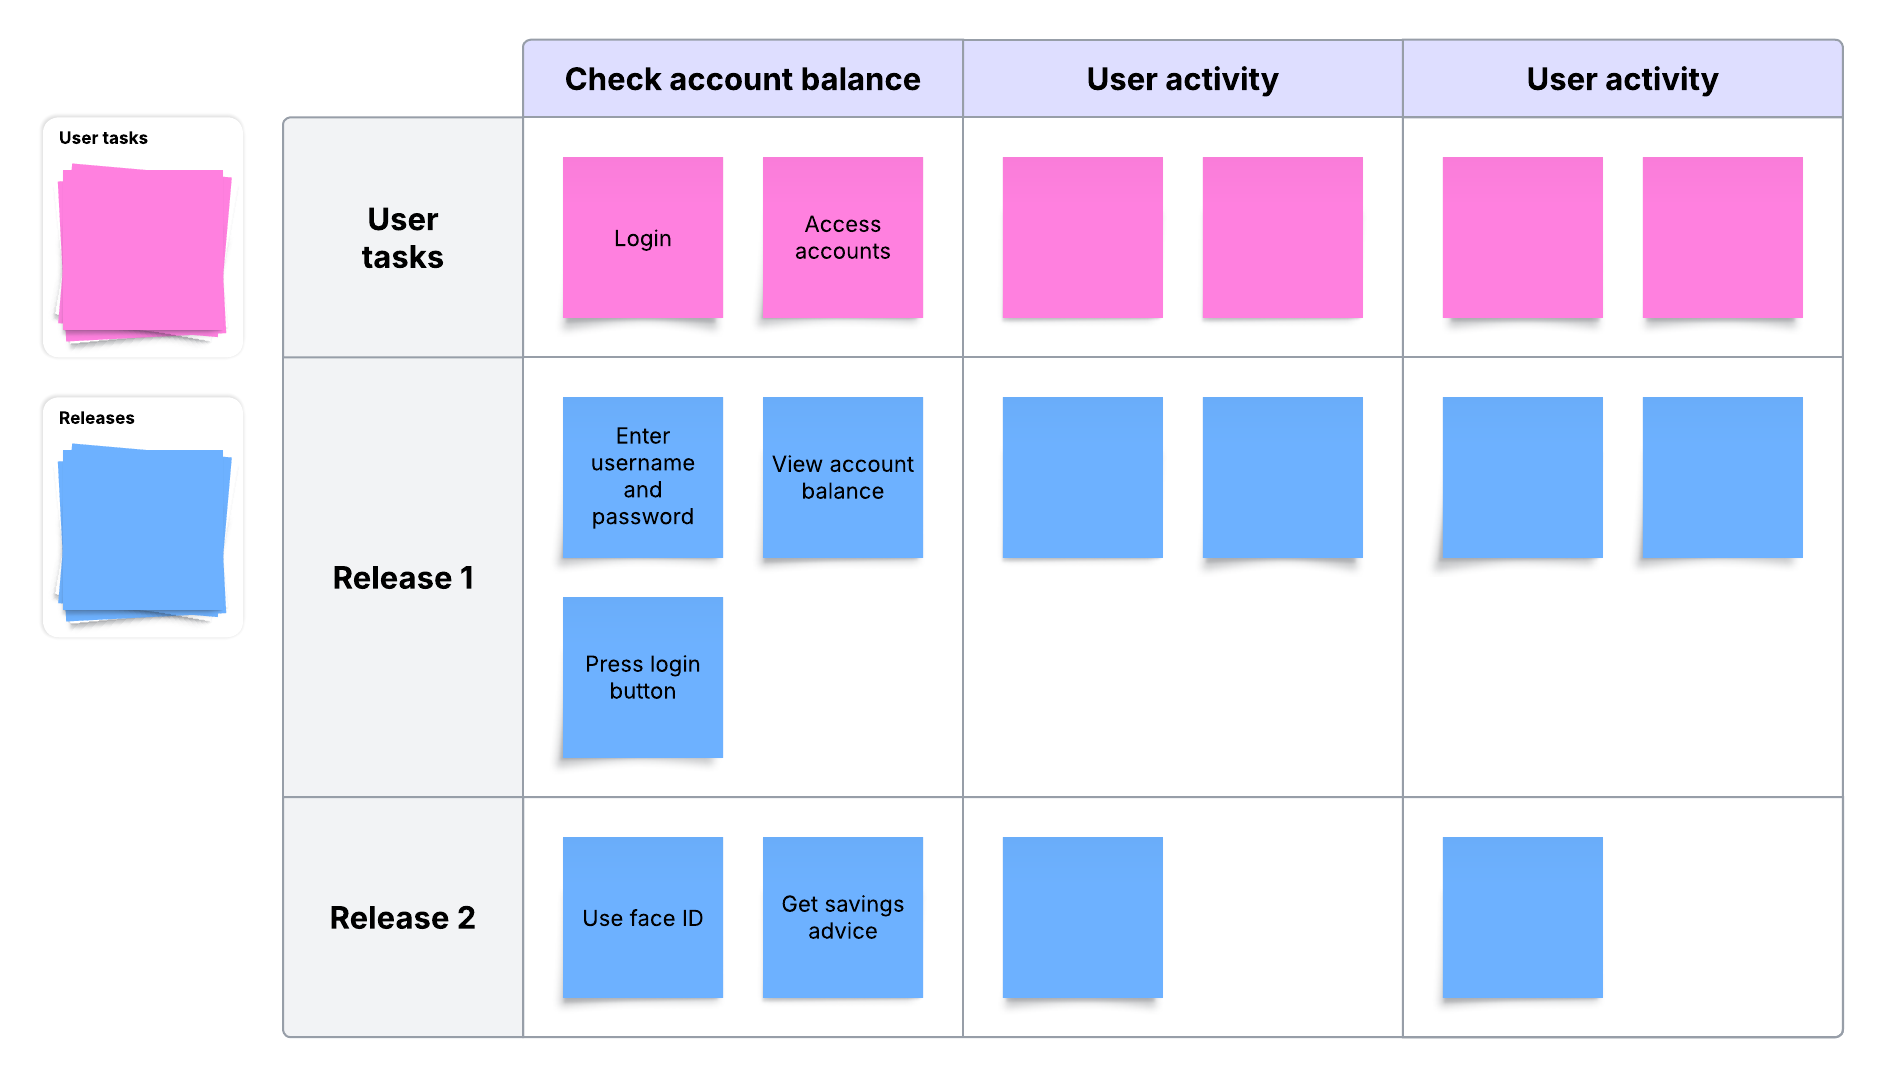
When you are ready to structure the map, place the high-level activities across the top and list the specific tasks required to complete them underneath. For example, the activity "Edit a video" would include tasks like logging in, recording, and exporting.
Pro tip: Prepare your board before the workshop
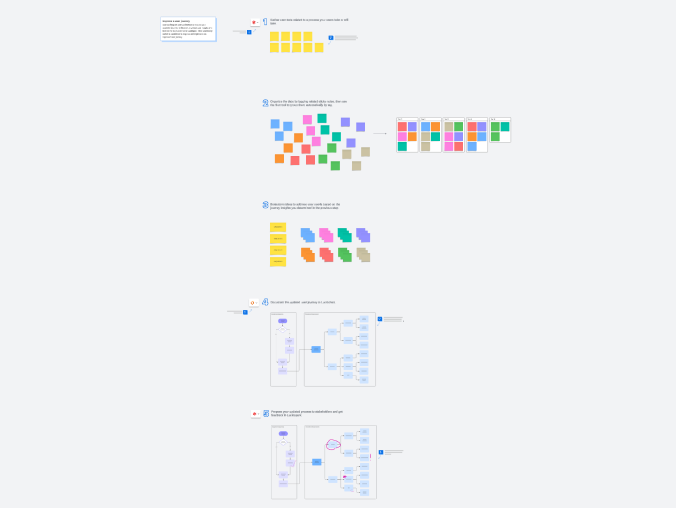
A little setup can make the mapping session run faster and feel less chaotic. Before your team meets, set up your Lucidspark board. You won't be jumping into the organization of the story map just yet—you'll need to start with a brainstorm. But the key to useful brainstorming sessions is to provide guidelines. First, add containers to organize your brainstorm. Potential containers could be labeled:
-
User activities
-
User pain points
-
Objectives and goals
It's useful to label your board, add collaborators, and even share a brief tutorial before the brainstorming happens.
4. Prioritize
After you identify and map out user activities and their corresponding stories, the production team can start prioritizing user stories. Rank stories vertically from most to least important to help the production team understand which stories have the greatest impact on the customer journey.
If you're using Lucidspark, you can also tag activities, pain points, or stories to make prioritization visible at a glance (e.g., "must-have," "should-have," "later," or by release). To keep the map usable, capture lower-priority ideas without forcing them into the current release plan.
5. Identify roadblocks
As the user story map takes shape, the team may begin to spot gaps in information, bottlenecks, or other issues that could slow down production. Use this step to identify solutions and workarounds.
6. Plan the sprint
All the mapping work culminates in the project planning phase. After user activities and stories are prioritized, they can be batched into sprints, where each piece of the user story map is assigned to a member of the production team with a clear explanation of how it should be completed.
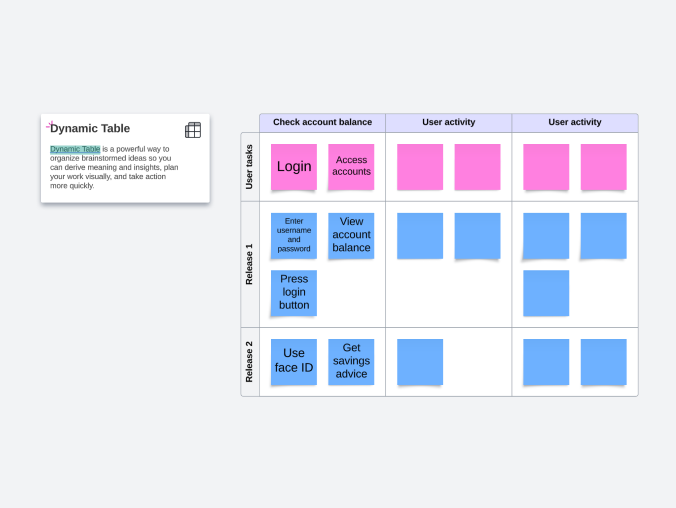
In Lucidspark, you can carry that work directly into execution by breaking features down into sprint-sized tasks using timelines or Dynamic Tables. This is a satisfying part of the process because you'll see how a brainstorm can lead to clear, bite-sized tasks assigned to team members. Better still, when everyone participates in user story mapping, they understand how smaller tasks serve the larger picture of the user experience, which can add clarity to the whole process.
Challenges of user story maps (and how to overcome them)
Here are some common challenges associated with user story maps, along with some tips to address them:
-
Your map is too generic or too detailed: There's a happy medium in how much detail to include. If your team isn't on the same page, you might not have enough detail, and you need to add more until everyone is aligned. If your team is becoming confused, then the steps are too detailed. Use simple language to minimize the risk of becoming too detailed.
-
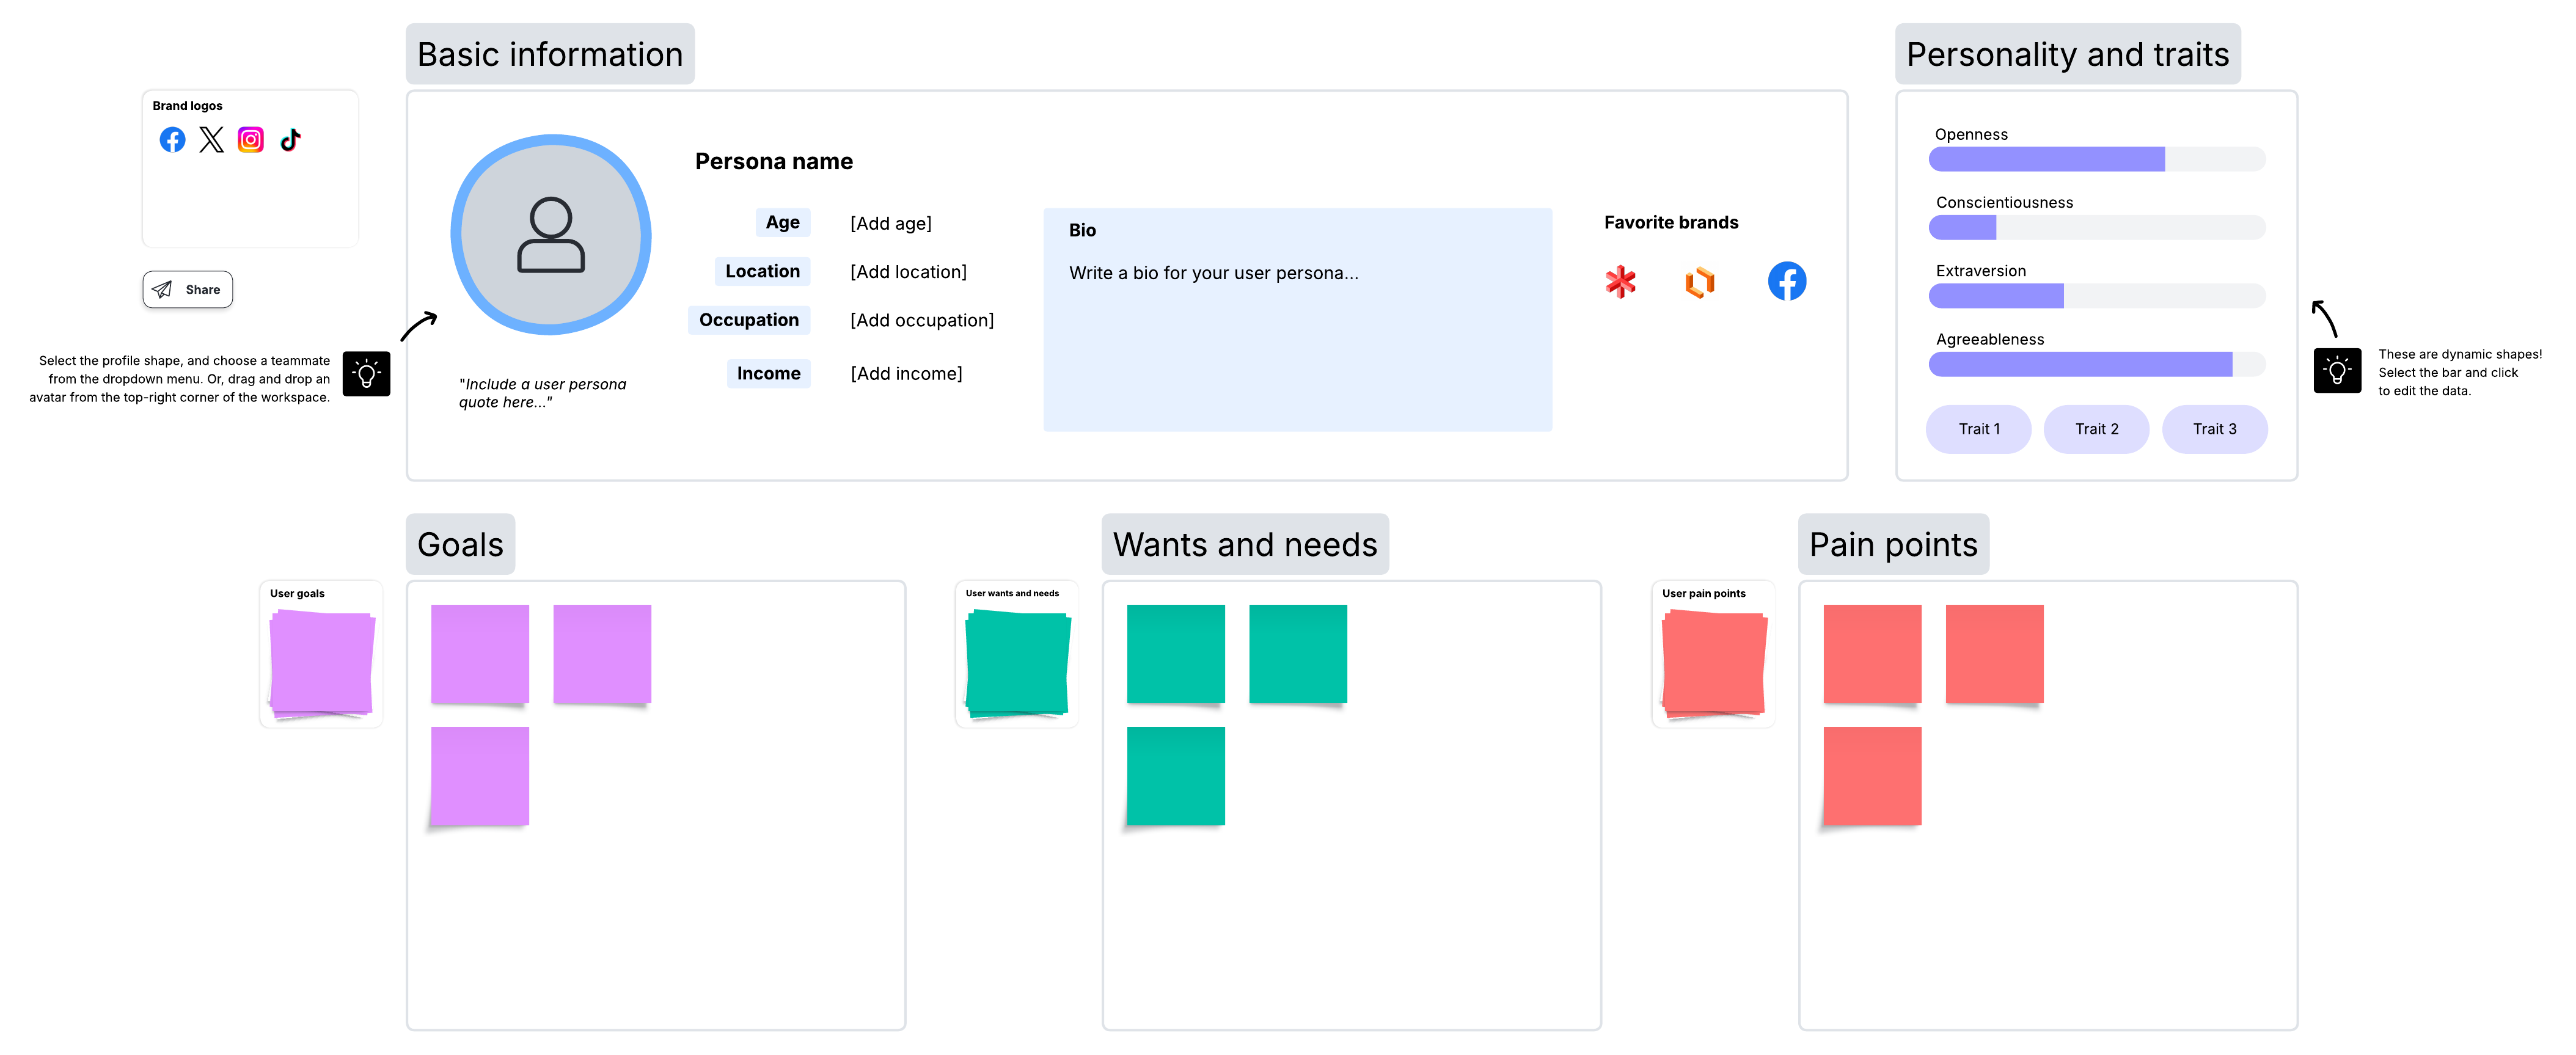
You don't know your users: If you don't know who your users are, you can't make a map for them. Use demographic data to understand who's using your product.
-
Your map is out of date: Creating a map on a cloud-hosted environment makes it easy to update anytime, anywhere. Cloud-based collaboration can also make it easier to keep stakeholders involved over time, whether they're co-located or remote.
-
You don't know why your product exists: This is a big problem. If you don't know what problem your product solves, you can't build a story map to determine how to solve it.
Next steps after user story mapping
Once the user story mapping exercise is complete, relevant stakeholders will usually review the mapped activities and stories. Remember that nothing is set in stone—you can and should make changes where needed. After all involved parties have agreed on a final user story map, the production team can begin development.
To get started, you can leverage any of the following diagrams and processes:
-
Quality function deployment: Develop a framework focused on addressing customer needs with this methodology.
-
Product backlog: Take a look at what you have in the pipeline for projects and identify levels of priority.
-
Product roadmap: Identify your product goals for the future.
-
Scrum or Kanban boards: Visualize which employee is in charge of each task, clarifying what's in progress, what's complete, and what's still to do.
-
Customer journey mapping: Take a closer look at the customer journey to guide decisions for the product or the business at large.
User story mapping is a useful practice for visualizing which work should be executed first to create the most effective end product. While it can be tempting to treat story mapping as extra, it's often a key step for uncovering user pain points and motivators early, before they become expensive rework.