Contents
How to make a decision tree in Word
5 min
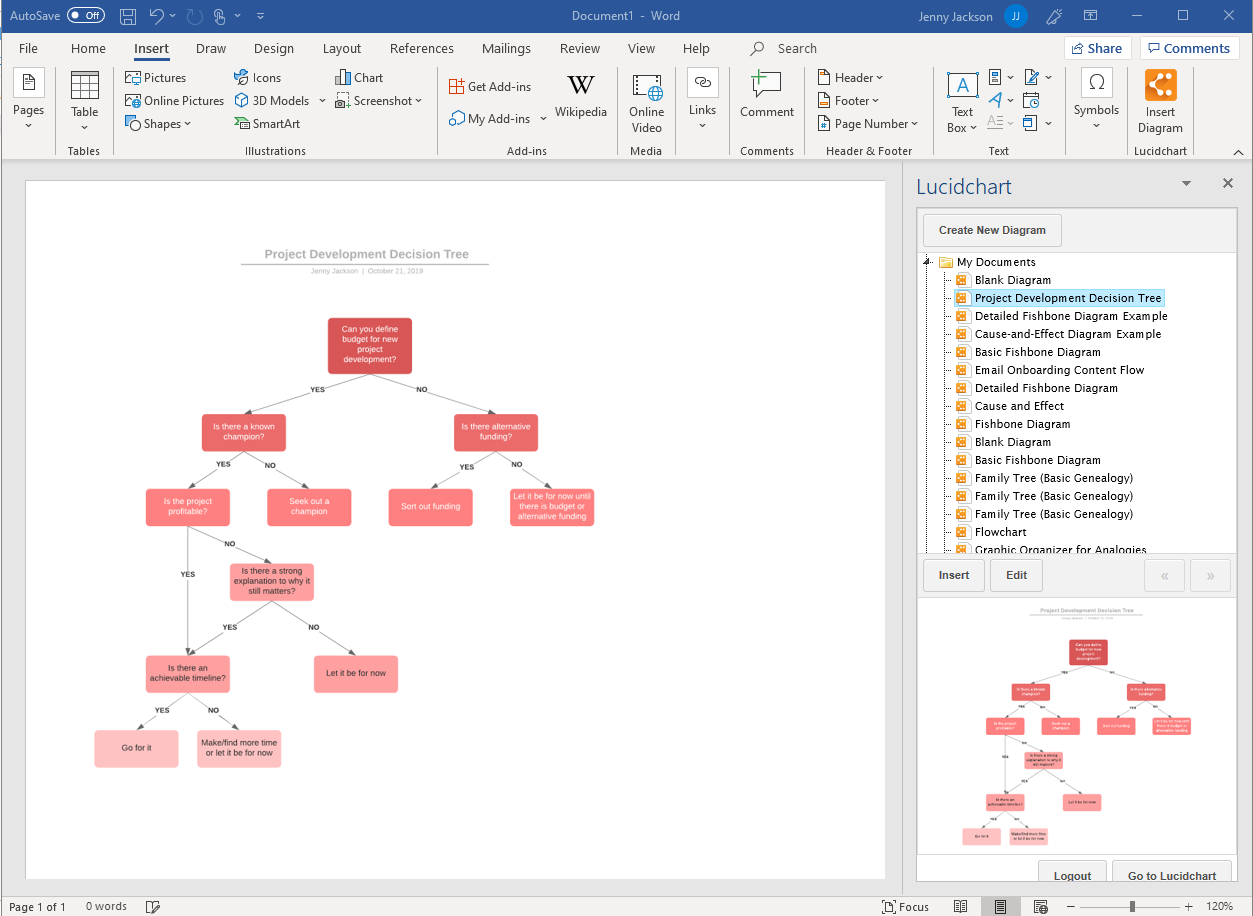
Eliminate the stress of manually creating a decision tree in Word. Diagramming in Lucidchart is the collaborative, efficient way to visualize the best path forward.
Decision tree templates

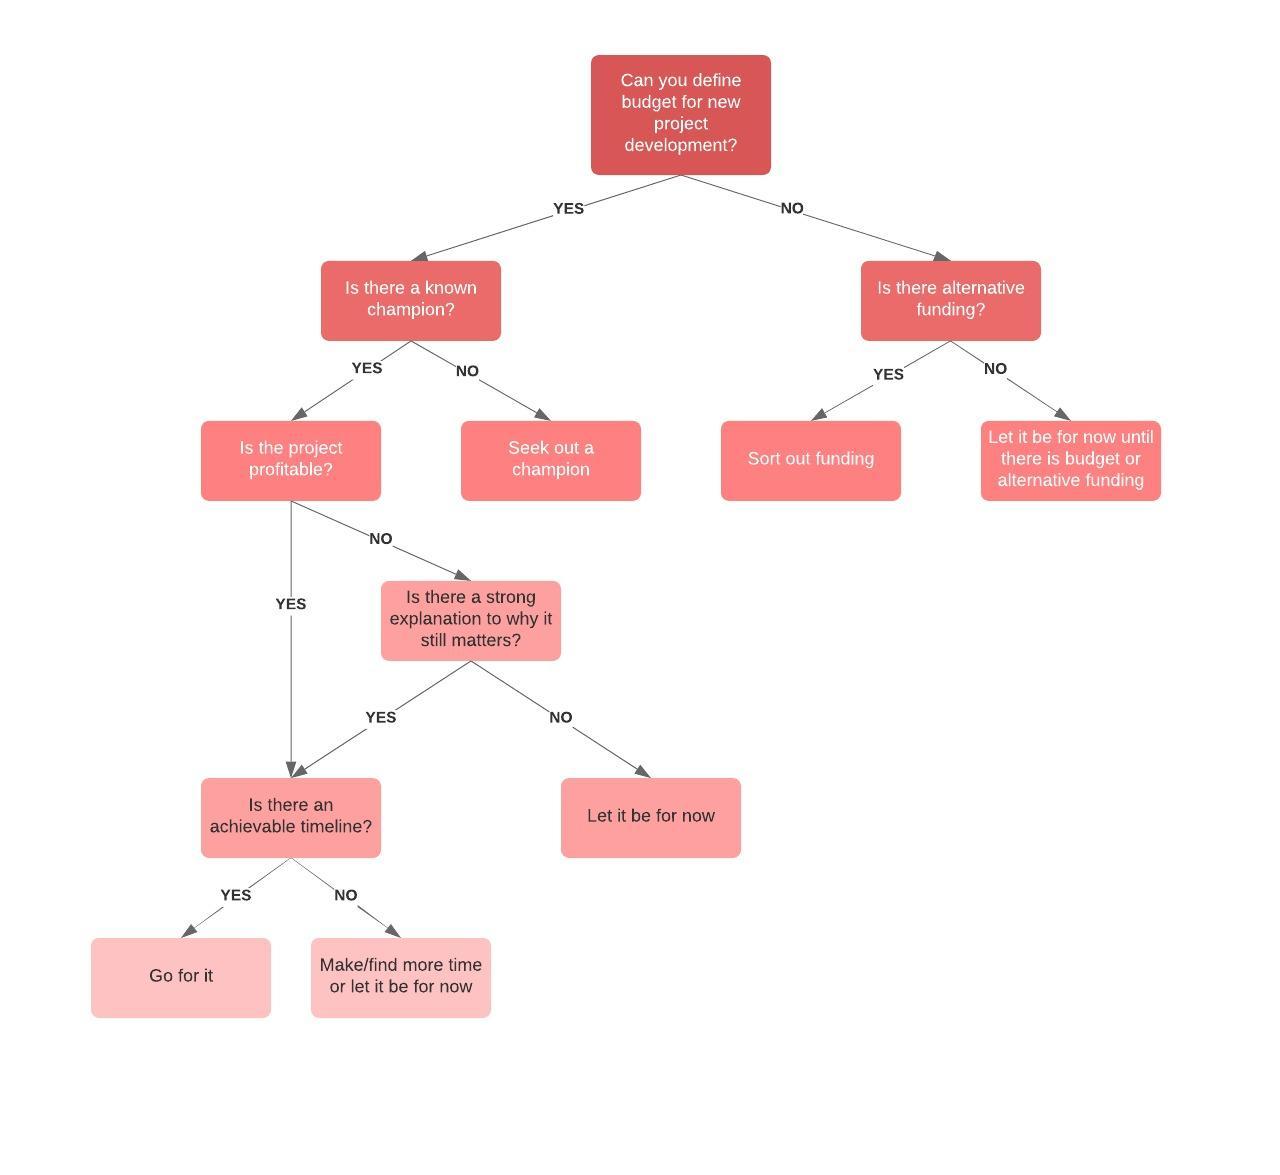
Project management decision tree
Pricing:
Paid Account
Project management decision tree, Pricing: Paid Account
Decision tree diagram resources
How to make a decision tree diagram in Google Docs
Learn how to make a tree diagram in Google Docs to enhance your reports and standardize best practices. The key is Lucidchart. Read more to see how!
7 tips for faster diagramming in Lucidchart
Whether you are a new diagrammer or a power user, check out these seven tips from Lucidchart product experts to learn how to diagram more efficiently.
How to make a data flow diagram in Word
Find out how to make a data flow diagram in Microsoft Word using the shape library and with Lucidchart add-in. Templates included!
Everything you need to make a diagram
In addition to our online diagram maker, Lucidchart offers support and training resources to help you branch out to any type of diagram.
View training labs